Here at LaBella Flora, we are on the cusp of one of our busiest times of the year. Our winter clearance is shipping out to make room for all of the new gorgeous spring arrivals we’ve been receiving, which is also a fun time for us to see all of the adorable spring styles! Throughout the hustle and bustle of flipping seasons, our owner, LaDonna, thought it would be a good idea for us to do a team building activity so that we could take a little break from the grindstone. We thought we’d share!

Being the girly girls that we are, (there’s only 6 of us ladies here full time!) we couldn’t just do the average team building activity. Domino building and sports contests aren’t exactly our cup of tea, unless it’s playing with (or watching) our kids! So LaDonna knew we would have to come up with something that we liked and also would be fun.
Here is our supply list:
- Mini hanging chalkboards
- Clear Elmer’s glue (in hindsight it didn’t really have to be clear, but we liked it better)
- Assorted glitter in different sizes and colors
All in all, we had a $25 budget for the project for 6 people. It worked out great, and we had lots of supplies left over!
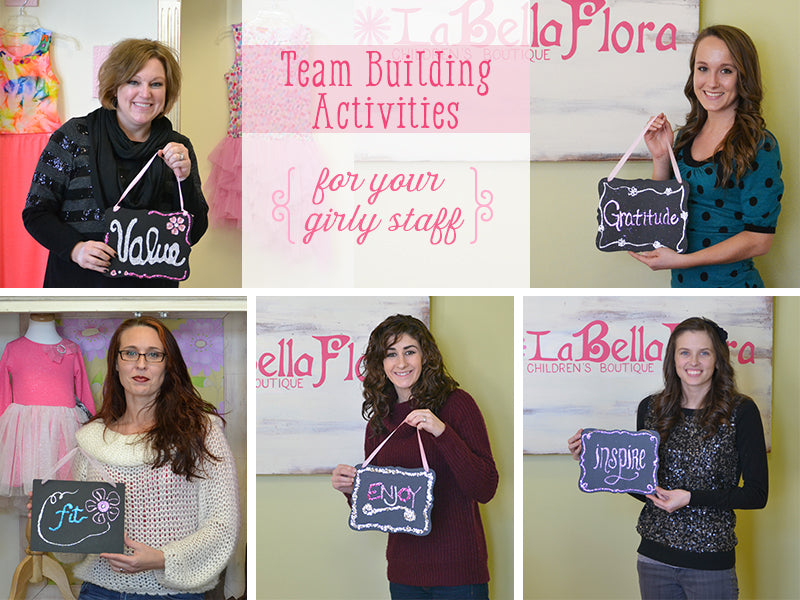
- Choose 1 word. We were all to choose a word (yes, only 1!) to be our motivation for an entire year. It could be pertaining to work and other areas in life. For example, since I do all of the writing, graphic design and social media, my choice was “Inspire” so that I could look at it on my desk and it would remind me of what I am striving to do in my life and in my job; Inspire people!
- Write your word on your chalkboard. Really, you can have fun with this part! Some people did cursive, others did standard letters, the options are endless! We found it was easier to write it on very lightly in pencil beforehand, so that we could properly map out how much space we needed for the design.
- Go over your word with glue. This is the hard part, try to keep the lines thinner so that they dry easier, and make sure that they are big enough on your initial design so that you can still read it clearly afterward.
- Choose your glitter colors. Of course, this was just as hard! We had so many darn choices, it took us all so long to figure out how we wanted it to look.
- Sprinkle the glitter over your letters and let it sit. You can either sprinkle them over your entire word, or if you want to get really crafty you can do one at a time and alternate colors.
- While your word is drying, decorate the outside. The majority of us just did cute little frames around the chalkboards, but some decided to make little flowers out of the bigger gems and with glitter.
- After it dries, shake it off! Waaaa-la! You have a gorgeous new sparkly motivational piece that can sit by your desk and/or office!
Have any other fun ideas we should try? We’d love to hear your feedback! This was so much fun, I hope we’ve inspired you to try something fun as well!
xoxo Cassidy